Online Digital Forensics Courses and Labs
Building a Low-cost and State-of-the-art IoT Security Hands-on Laboratory
Funded by National Science Foundation (NSF)
IoT Smart Car Lab 2: WiFi controls
Installing Node-Red, MQTT Broker, and Dashboard
Installing Node and Node-Red
Visit the Node.js website and click on the latest LTS download. Open the file you downloaded and follow the steps to install Node.js onto your computer.
Once you have Node.js installed onto your computer open up command prompt. On Windows this can be done by clicking on the Windows button, typing in "command prompt", and then clicking on the command prompt program that comes up. Once command prompt is open type the following command and then hit Enter:
Installing the MQTT Broker
Once Node-Red has installed enter the following line and hit Enter:
Installing the Dashboard
After that has installed type the following line and hit Enter:
Finally type the following line and then hit Enter:
Creating the WiFi Controls
Now that you have Node Red up and running it's time to create the WiFi controls for the smart car.
Adding the MQTT Broker
First, look on the left of the Node Red webpage. You should see a sidebar with different "nodes" labeled "input", "output", etc...
Drag the node labeled "mosca" over onto the tab named "Flow 1". You will see that once it is placed its full name is "Mosca MQTT broker". This is the MQTT broker we installed in the previous section.
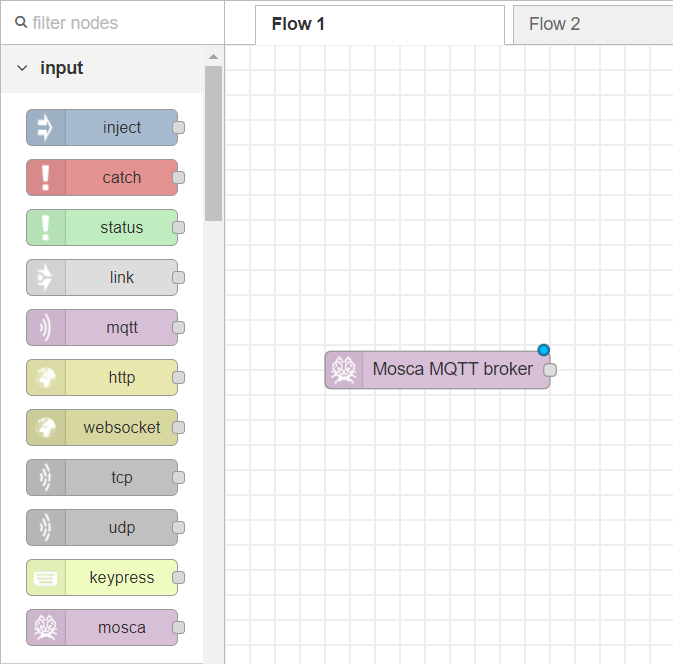
Figure 1: Mosca MQTT broker node
Adding the Output Node
Now that we have the MQTT broker in place, lets go ahead and add an MQTT output so that we can send outputs to the car.
Underneath of the "output" category in the sidebar drag and drop the node labeled "mqtt".
Double-click on the node to open up its properties.
- For "Server" click on the pencil icon to add a new server.
- Under the "Connection" tab enter localhost for the "Server" and 1883 for the "Port" then click "Update".
- Back under "node properties" click on the server dropdown and select localhost:1883.
- For the "Topic" enter car/drive.
Controls to drive the car
Back on the sidebar under the "input" category you should see a node labeled "inject". This is the node we can use to send messages to the MQTT output. Drag and drop one of these nodes over. You will see its name change to "timestamp".
Double-click on the inject node to open up its properties. Click the dropdown next to "Payload", select string and then type in forward with all lowercase letters. For "Topic" enter car/drive just like previously. Click "Done".
Repeat this four more times with four more nodes entering the strings back, left, right, and stop.
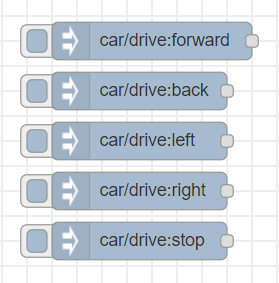
Figure 2: Nodes used to drive the vehicle
Connecting the messages to the MQTT output
Now we will connect these messages to the MQTT output node. On the "inject" nodes you will see a gray box on the right side of the node. On the "mqtt" node you will see a gray box on the left side of the node. Drag from the gray box to the gray box on the left side of the MQTT output node. This should draw a line between the nodes if connected properly. Do this for each of the injection nodes to the MQTT output node.
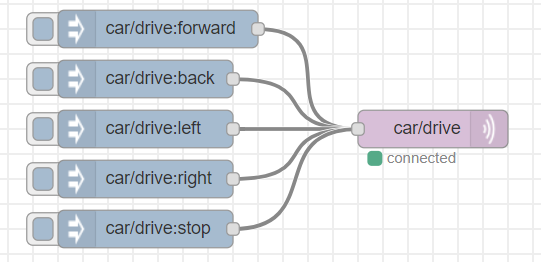
Figure 3: Connecting the nodes to the MQTT output node
Driving the car
Finally after setting up all of the nodes hit "Deploy" in the upper right hand of the webpage to save the changes.
Now you should be able to drive the car over the WiFi network!
On the injection nodes press the buttons on the lefts to drive the car.
Building the Dashboard
As you may see it is a little difficult to control the car with the buttons on the nodes. So let's build a dashboard with buttons that we can use to control the car!
Earlier we installed the dashboard when setting up Node-Red. Open another tab in your web browser and navigate to localhost:1880/ui. You should see a message saying "Welcome to Node-RED Dashboard". Currently there is nothing there, so lets go ahead and create our dashboard.
Adding a Tab and Group
Back on the Node-Red webpage, on the right side of the Node-Red webpage you should see three tabs labeled "info", "debug", and "dashboard". Navigate to the "dashboard" tab.
Under the "Layout" tab click on the "+tab" button. You will see "Tab 1" appear under "Tabs & Links". Hover over it and click on the "edit" button. Change the name to whatever you'd like (like "Car" or "Smart Car"), then click "Update".
Hover over the tab you just named and click the "+group" button. Hover over the "Group 1" group that is added and click on "edit" again. Name this group "Drive". Make sure next to "Tab" it has the tab you just made and named. Click "Update".
Adding Buttons
Now that our dashboard has the tab and group we can now place buttons onto the dashboard. When we click these buttons it will make the same thing happen as when we click the tiny buttons on the nodes.
Back on the left sidebar of the Node-Red webpage scroll down until you see the "dashboard" group of nodes. You should see one that says "button". Drag this node out onto the "Flow 1" tab.
Double click on the "button" node to bring up its properties. Change the "Group" to the group you made named "Drive". Change the "Label" to "forward". Towards the bottom, for "Payload" change it to string and then type in forward, just like we did with the previous nodes. Make the "Topic" car/drive just like previously as well.
Repeat this again but replacing forward with back, left, right, and stop.
Like previously, connect the nodes to the mqtt output node labeled "car/drive". Drag from the gray box on the right of the button nodes to the gray box on the mqtt output node. Then hit "Deploy" again on the top right of the Node-Red webpage.
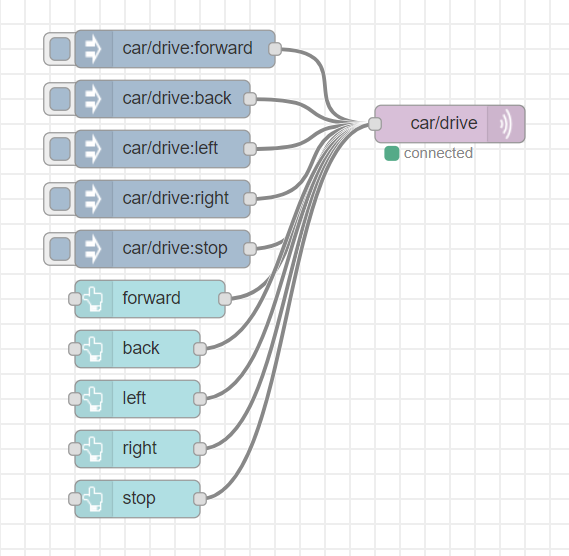
Figure 4: Buttons for the dashboard
Driving the Car
Back on the Node-Red Dashboard at localhost:1880/ui you should now see a group named "Drive" on your dashboard with the buttons on it.
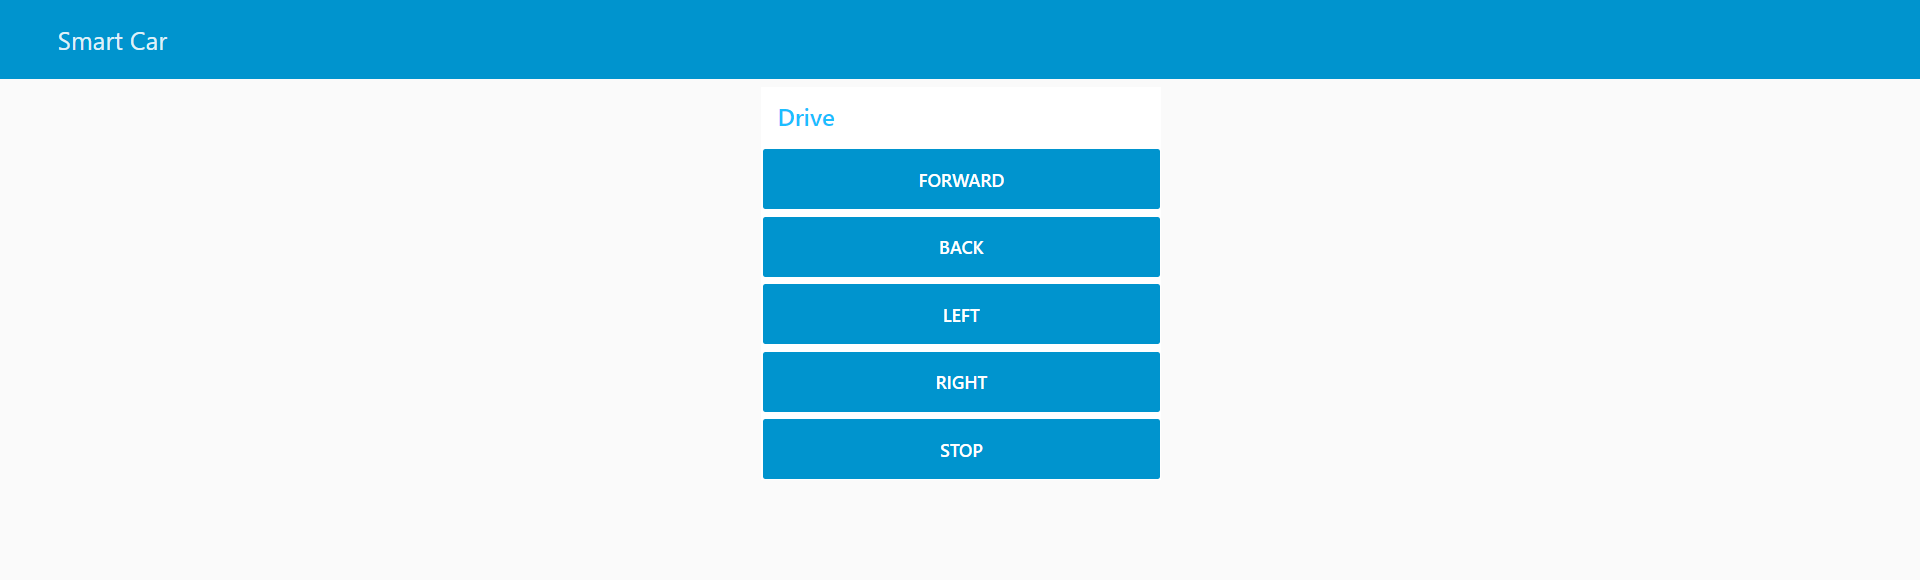
Figure 5: Dashboard with buttons to drive
Click on these buttons to drive your car around!
In the next tutorial we will add sensors to the car which will allow the car to gain information about its surroundings. Node-RED will be used to read the sensor values that are being sent by the microcontroller on the car. See the next lab here.
Take Away:
- How to set up Node-Red
- Basic MQTT ideas
- Flow-based programming concepts
- How to create a dashboard in Node-Red