Online Digital Forensics Courses and Labs
Building a Low-cost and State-of-the-art IoT Security Hands-on Laboratory
Funded by National Science Foundation (NSF)
Funded by Cyber Florida
IoT Man-In-The-Middle Attack

Courtesy of Manufacturers
Instructor: Dr. Yier Jin, 352-294-0401, yier.jin@ece.ufl.edu
Prerequisite:
- Knowledge of basic usage of a command line.
- Knowledge of basic usage of Linux machine.
Goals of this tutorial:
In this tutorial a Man-In-The-Middle (MITM) Attack will be performed. The learner will learn how to use SSH to access a device and modify its firmware. Secure Sockets Layer (SSL) Certificates will be viewed, and the information acquired will be used to issue certificates for a specific domain. Finally, a MITM attack is used to intercept and decrypt HTTPS requests. These will be done using a Xiaoyi camera.
Overview:
- Modify the files of a Xiaoyi camera through SSH
- View SSL certificates
- Issue certificates for a domain
- Intercept and decrypt HTTPS requests
Hardware Needed:
- Yi Dome camera, made by Xiaomi
- TL-WN725N wireless adapter
- SD Card
Software Needed:
- Virtual Box (if you do not have Virtual Box installed please see Lab Setup). The system image is provided in the "environment" folder of the flash drive.
- If performing this tutorial remotely, the necessary files can be downloaded here.
- Wireshark (provided in test operating system)
- mitmproxy (provided in test operating system)
- Yi Home App (Download from AppStore, Android/iOS supported, account:sslab.ece.ufl@gmail.com/Ww36306834)
Environment Setup:
Setting up the Virtual Machine:
Open Virtual Box and go to File/Import Appliance. Underneath of "Appliance to Import" select the IoT Security Ubuntu VM.ova. Boot up "IoT Security Ubuntu VM" and login with account: security/enjoy.
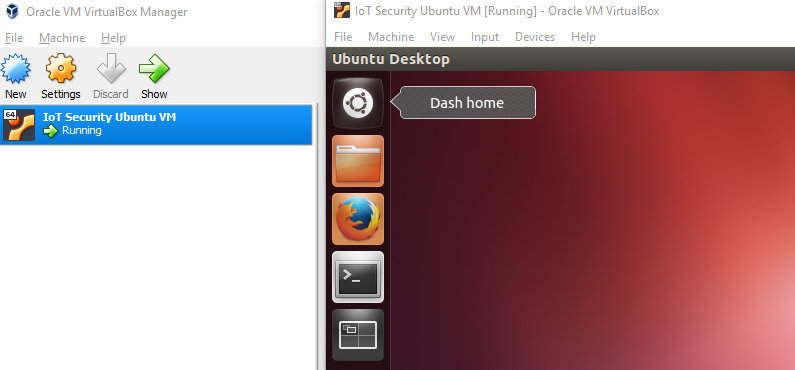
Figure 1: VirtualBox homescreen showing IoT Security Ubuntu VM
Plug in the TL-WN725N wireless adapter and connect it to the VM by going to Devices/USB and selecting "Realtek 802.11n WLAN Adapter".
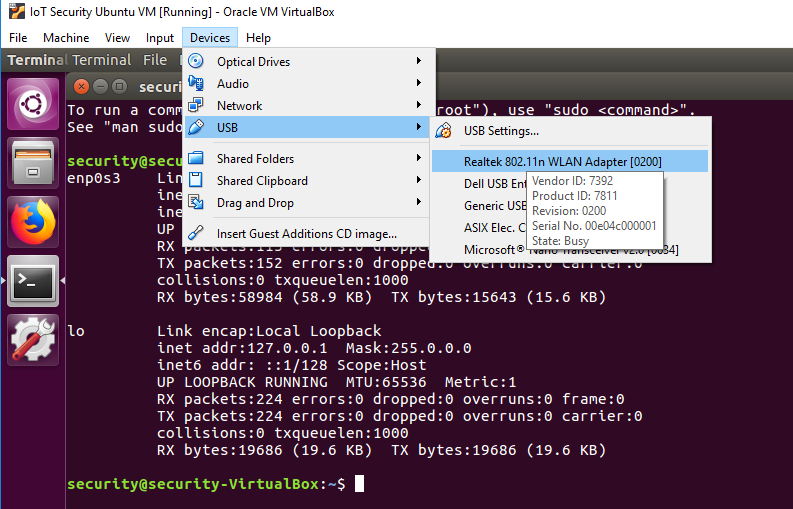
Figure 2: Selecting the network adapter
Setting Up the Wireless Shared Network within Test Operating System:
To get the wireless interface name open Terminal and enter the following command:
You might need a few minutes to wait for the current output results with the wireless interface information. The 'iwconfig' command might be blocked while acquiring results but it's ok. You should see the following outputs in Terminal:
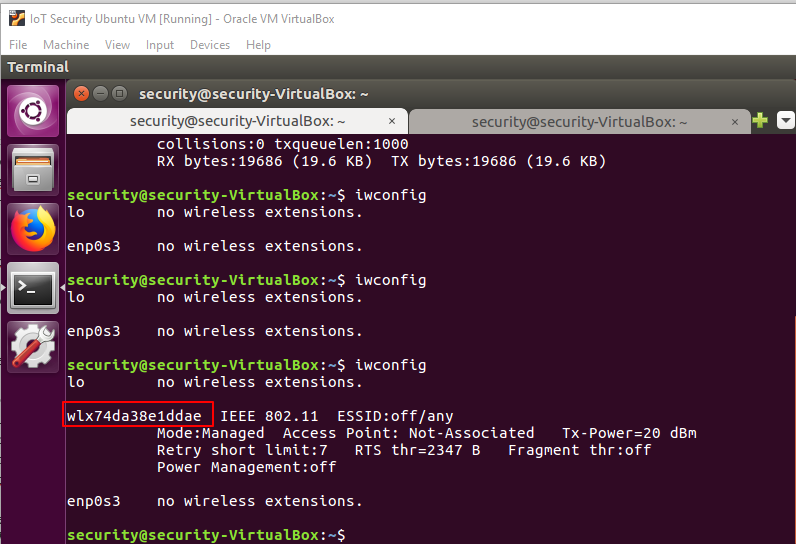
Figure 3: "iwconfig" command output
Type the following command to setup a shared wireless network for later use:
Please Note:
- Always use sudo for this operation.
- wlx74da38e1ddae is the wireless interface name that came from the last operation.
- enp0s3 is the wired/wireless interface you want to share, usually it's named enp0s3 within the Virtual Box.
- hostspot_name is the Wi-Fi name you want to create, please use a unique name to avoid mixing up Wi-Fi names with your classmates.
- changeme is the key associated with your shared hotspot, please change it for security reasons.
If create_ap gets stuck at the unmanage device step, try using the following command to fix it:
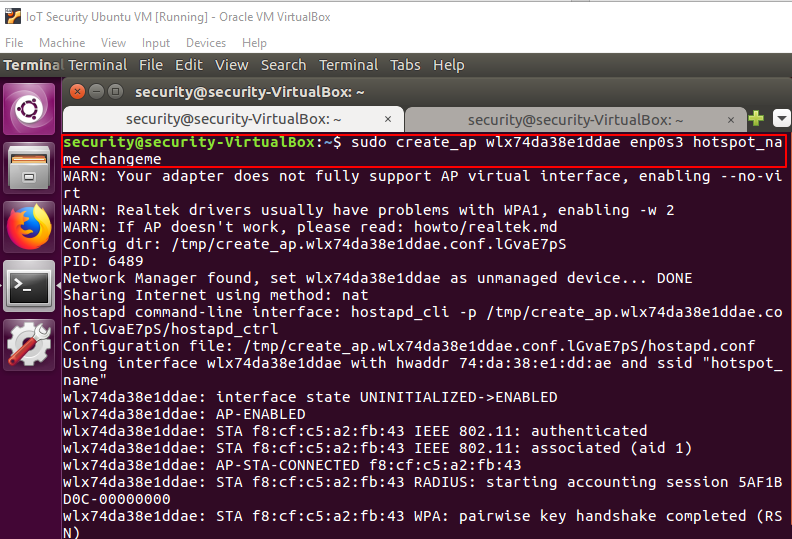
Figure 4: "create_ap" command output
Use your phone to connect to and test this shared network. Please ALWAYS keep this terminal window open to maintain the shared wireless network.
Camera Setup:
Download the "YI Home" app on your phone. Power on the Yi Dome camera and wait for voice instructions. Connect your phone with the shared wireless network. Launch the Yi Home app and log in with username/password: "sslab.ece.ufl@gmail.com/Ww36306834".
Click the upright corner and select the "YI Dome Camera". After hearing the camera click "I heard 'Waiting to connect'". Enter in the WiFi network and password on the next screen and click "Connect to Wi-Fi". Face the QR code to the camera lense and wait for the camera to respond, then click "Next". Then wait for the camera to pair.
If the camera has paired successfully then move on to the Remote Attack section. If not, please try the setup again. You may need to reset the camera by holding down the "RESET" button on the back of the camera.
MITM Attack:
Preparing an SD Card with the firmware (Copying to the SD Card):
The SD card has already been prepared with the modifed firmware. If you need to redo the SD card setup then see the following paragraph:
Insert the 4GB micro SD card into your computer. Format the SD card and copy "rootfs_v201" and "home_v201", located in "environment/xiaoyi" on the USB, into the SD card root path.
Placing the SD card into the camera:
Remove power to the camera. Insert the micro SD card, then turn the power back on.
Finding the Xiaoyi camera IP address:
Open a new terminal window and use the following command to check the Xiaoyi camera IP address:
Usually the last "dnsmasq -dhcp REQUEST" message contains the IP address of the recently connected Xiaoyi camera. Since you have connected your phone earlier it may show up. As seen in the image below 192.168.12.200 wasn't selected as the Xiaoyi's IP address because the last log indicates it belongs to an android phone.
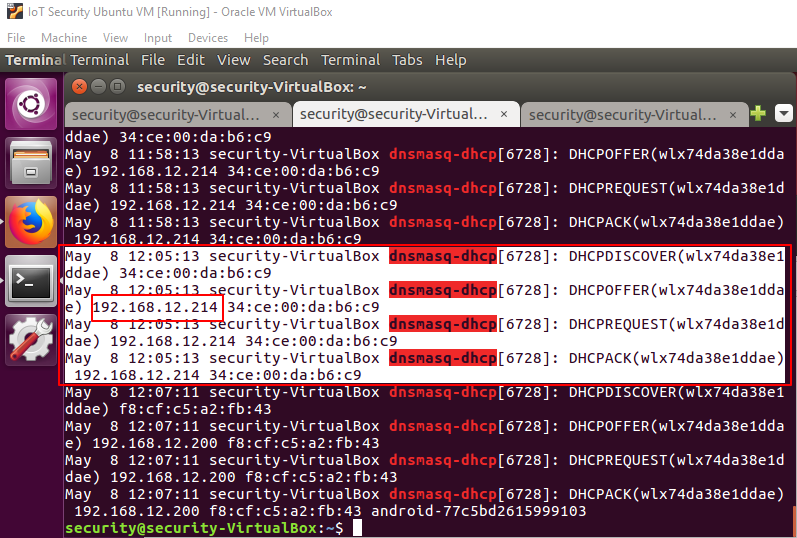
Figure 5: Finding the Xiaoyi Camera's IP address
Verifying the IP address just found:
To verify the IP address check the camera 80 port status using the following command inserting the IP address you found for "IP_ADDRESS":
You should see a similar output to the following image:
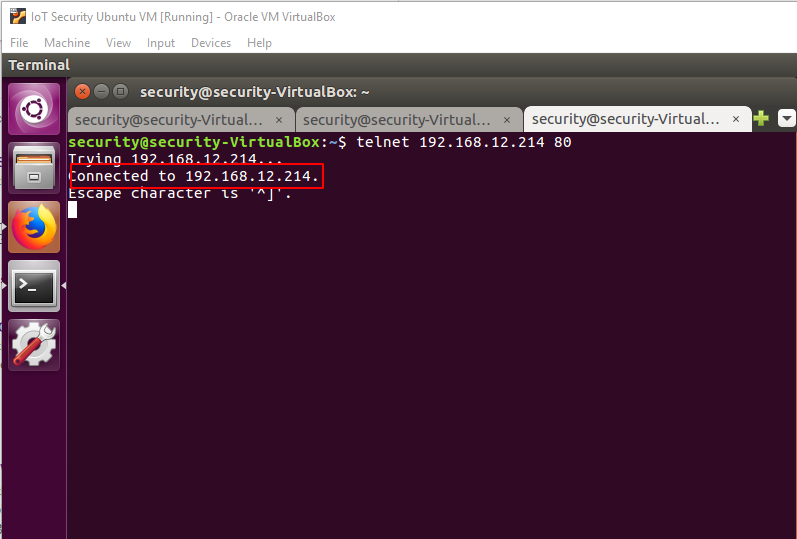
Figure 6: Verifying the Xiaoyi Camera's IP address
Open Firefox, visit "http://device-ip/" where "device-ip" is your camera's IP address. You should see the following page:
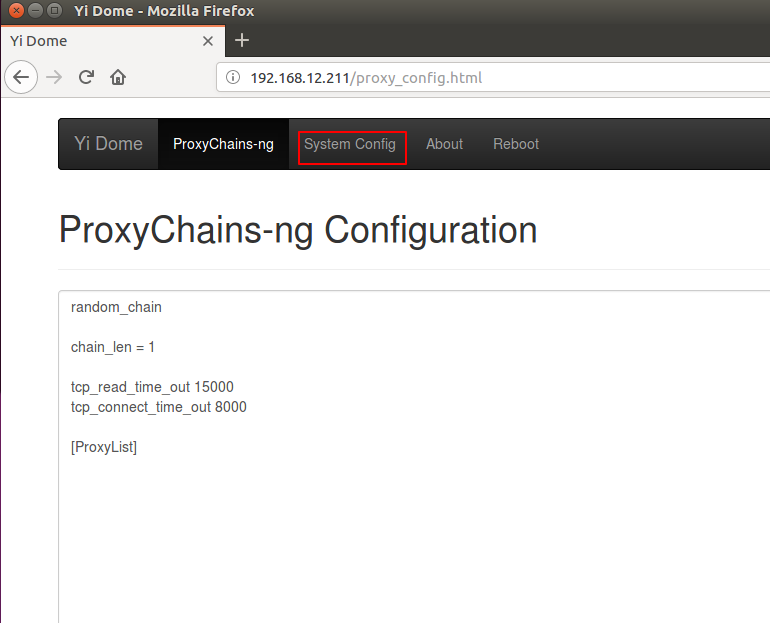
Figure 7: Opened page in Firefox
Enabling the hacks:
Visit "http://device-ip/". Click "System config". Disable ProxyChains-ng and enable Dropbear.
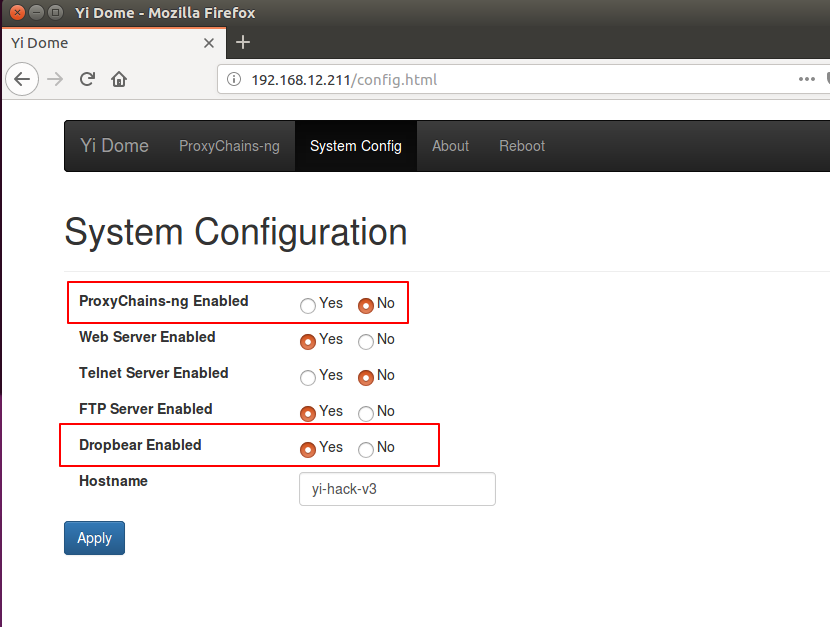
Figure 8: System Configuration for the Xiaoyi camera
Logging into the SSH server on the Yi Dome Camera and removing the internal certificates:
SSH into the device using the following command:
The password is blank, and you can just hit enter to access.
Execute the following commands:
Gathering additional information for later use:
In order to intercept the encyrpted network traffic we need more information.
Launch Wireshark to monitor all network traffic by opening a new terminal window and executing:
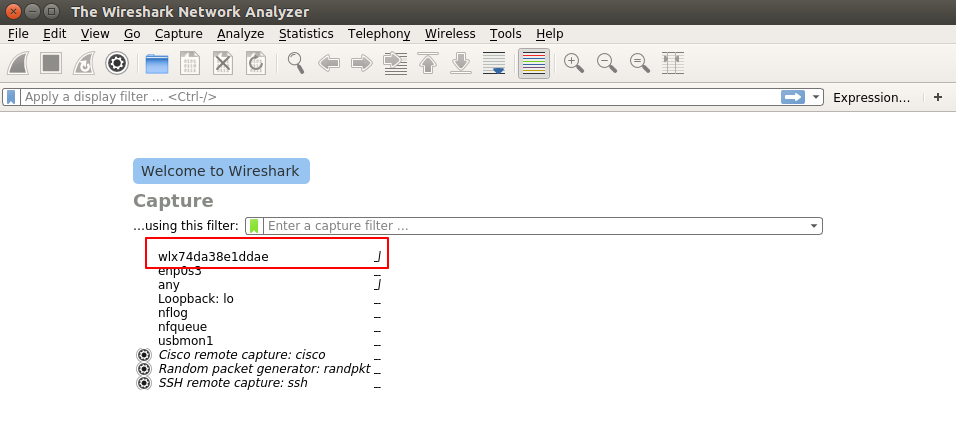
Figure 9: Wireshark
Once Wireshark opens, choose the wireless interface (shown above). Use wireshark filter "ssl.handshake.certificate" to filter out all valid certificates. Remember to press enter after input to apply filter rule.
Close the Yi Home App and then reopen it. Then go to the camera and make sure you can see the camera feed.
In Wireshark, choose one item of the results, and navigate to certificate subject name, thus, we get the important subjects value to certificate from api.us.xiaoyi.com, they are:
- countryName=CN
- stateOrProvinceName=Shanghai
- localityName=Shanghai
- organizationName=Shanghai Xiaoyi Technology co., LTD
- commonName=api.us.xiaoyi.com
Record these values because they will be used later.
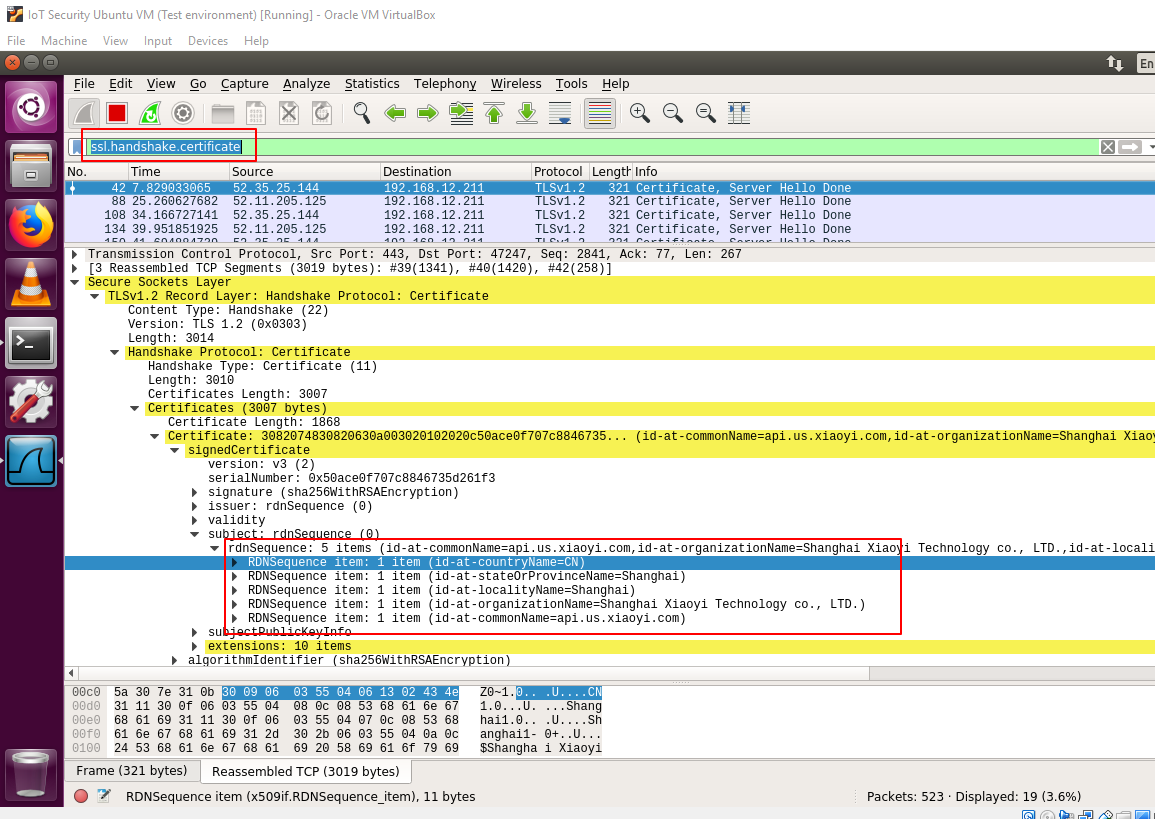
Figure 10: Subject values from valid certificate
Use the filter "dns.resp.name" to get all dns responses of domain "api.us.xiaoyi.com". From the following figure we can see there are two IP addresses corresponding to domain "api.us.xiaoyi.com". Record these IP adresses, as they will be used later.
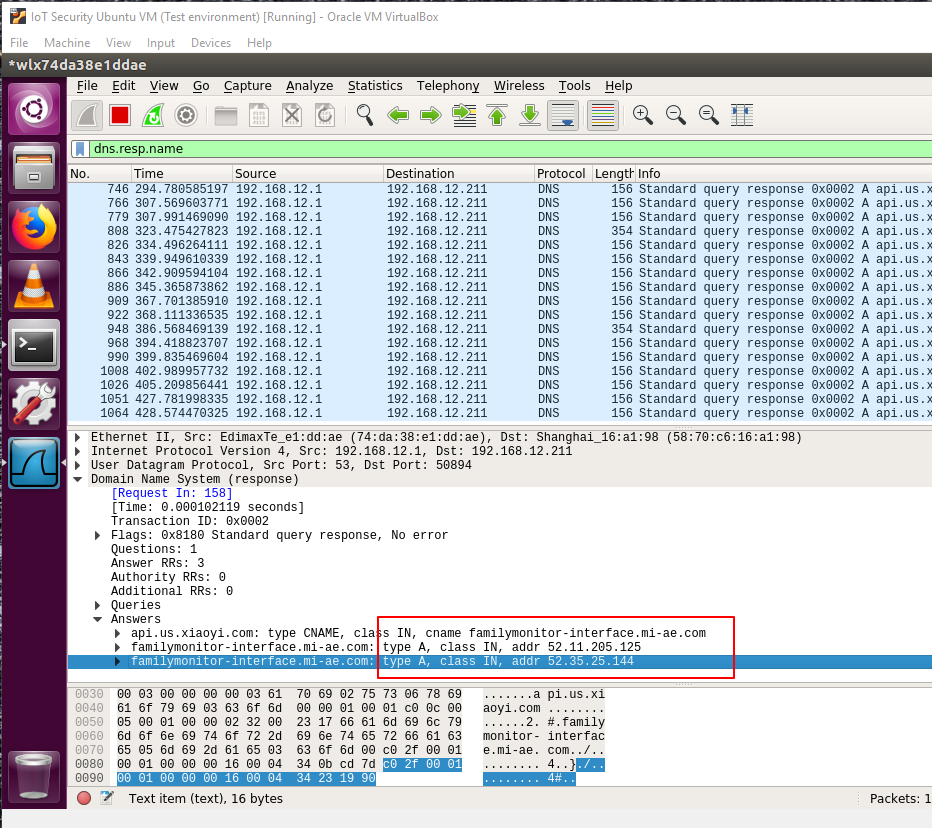
Figure 11: IP addresses for "api.us.xiaoyi.com"
Issuing Certificates for the domain "api.us.xiaoyi.com":
Open a new terminal window and execute
Then execute the following command:
Fill up the subject name with the information gathered from wireshark, the most important subject is Common name, please be aware to fill up the right value.
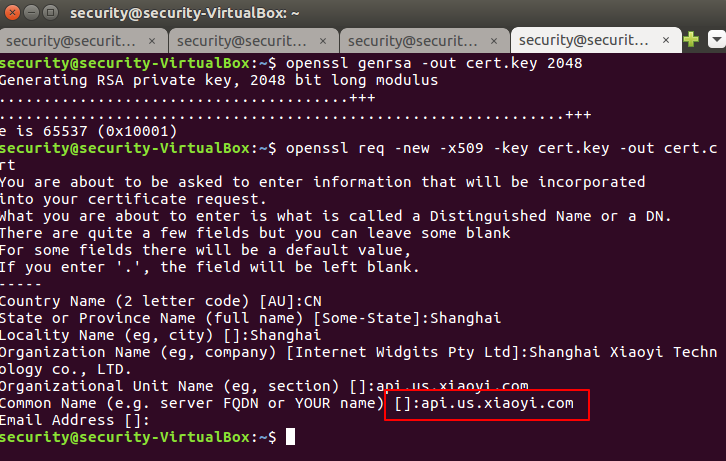
Figure 12: Filling in the subject values for the certificate
Generate the certificate with private key for mitmproxy with the following command:
Replacing the certificate of the Xiaoyi Camera:
To get the public key of the certificate use the following command in terminal:
Select and copy the output content. Be sure to include "----BEGIN CERTIFICATE-----" and "-----END CERTIFICATE-----". Do not copy any additional lines after the last "-----" characters.
Login to the Xiaoyi camera via ssh:
Then create a new file using the following command:
This should be a new file, if not, use the following command to remove it:
Type "i" to enter insert edit mode. You should see an "I" at the bottom of the terminal screen. Paste the public key of the certificate into this file. Press "esc" to exit mode. Then type ":wq" and hit "Enter" to exit vi.
Repeat the last step replacing the content with the same public key but this time executing:
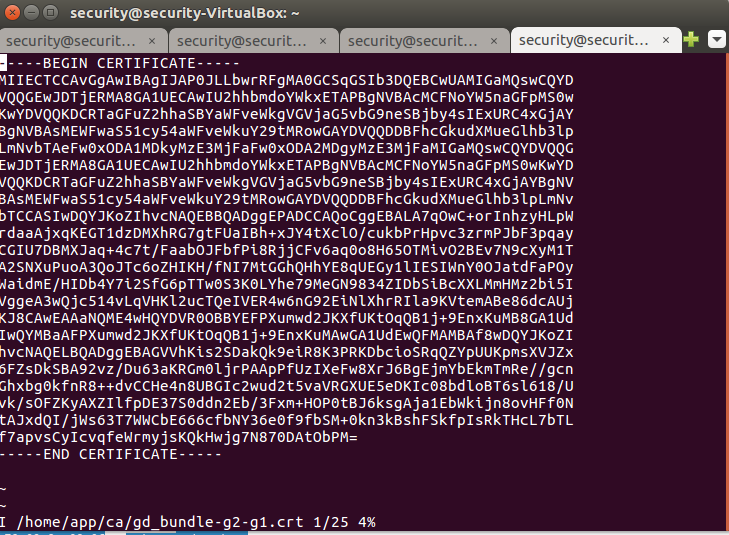
Figure 13: Editing the certificate on the Xiaoyi Camera
MITM attack environment setup:
Transparent Proxying: when a transparent proxy is used, traffic is redirected into a proxy at the network layer, without any client configuration being required. This makes transparent proxying ideal for those situations where you can't change client behaviour - proxy-oblivious mobile applications being a common example
Enable IP forwarding by opening a new terminal window and executing these commands:
Disable ICMP redirects with this command:
Execute the following commands to create an iptables ruleset that redirects the desired traffic to mitmproxy. Please be aware that the "wlx74da38e1ddae" in following command is representing the aforementioned shared wireless interface.
Launching mitmproxy:
To get additional information launch the mitmproxy. Execute the following commands:
We are using "52.*" to represent we are going to intercept the HTTPS/TLS traffic connected with ip addresses started with 52.*. Change the 52 in "52.*" to the first two numbers from the IP addresses you found before. This value comes with the wireshark DNS result we acquired before. Also, the cert.pem means we will use our custom server certificate to decrypt all encrypted content. The SSLKEYLOGFILE means we are going to log all https session key to decrypt HTTPS traffic in wireshark.
Use the ssl session key in Wireshark:
You can specify the key file path in Wireshark via Edit -> Preferences -> Protocols -> SSL -> (Pre)-Master-Secret log filename. If your SSLKEYLOGFILE does not exist yet, just create an empty text file, so you can select it in Wireshark (or run mitmproxy to create and collect master secrets).
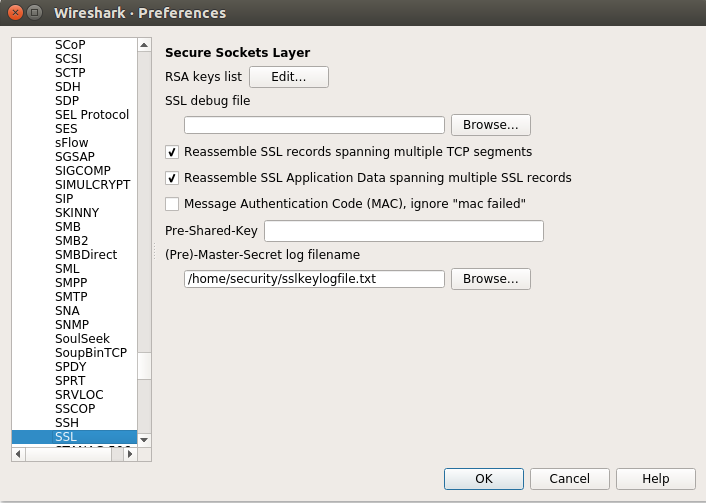
Figure 14: Entering the log filename in the preferences for SSL in Wireshark
Viewing HTTPS requests:
Use the filter "http" in Wireshark. You can see many HTTPS requests have already been decrypted to plain text.
If nothing is showing up make sure to restart the Yi app and go back to the camera feed like before.
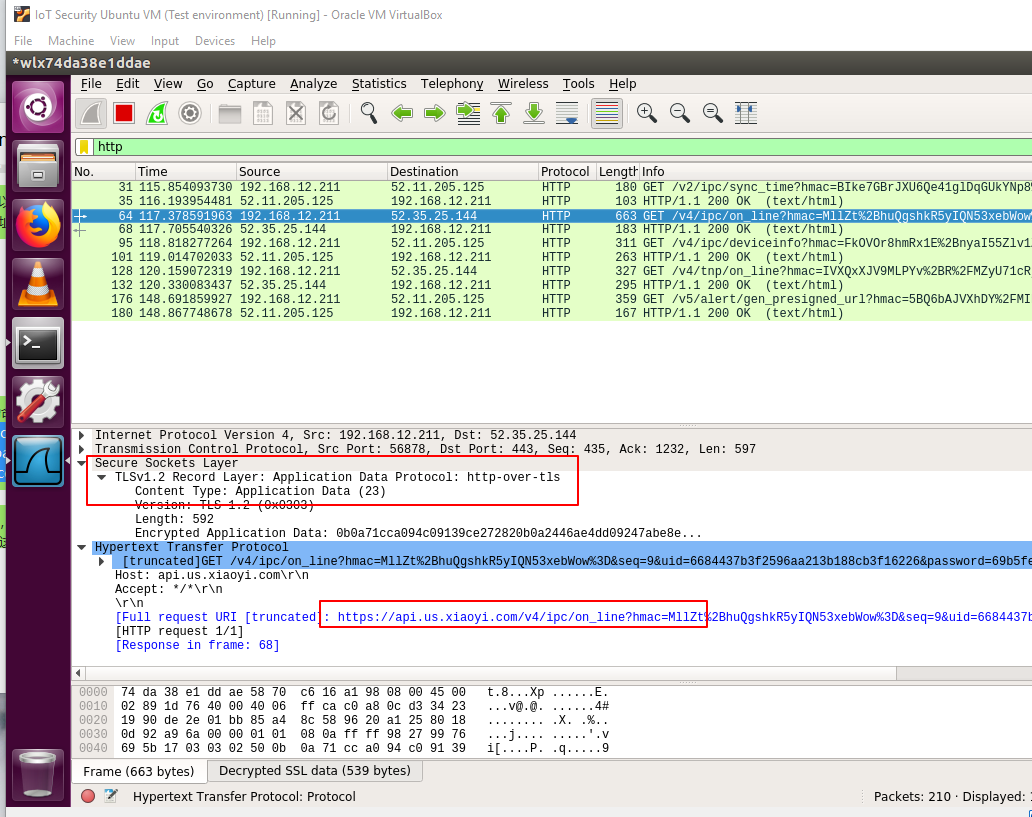
Figure 15: Viewing the HTTP request in plain text
You can also view this in the mitmproxy window:
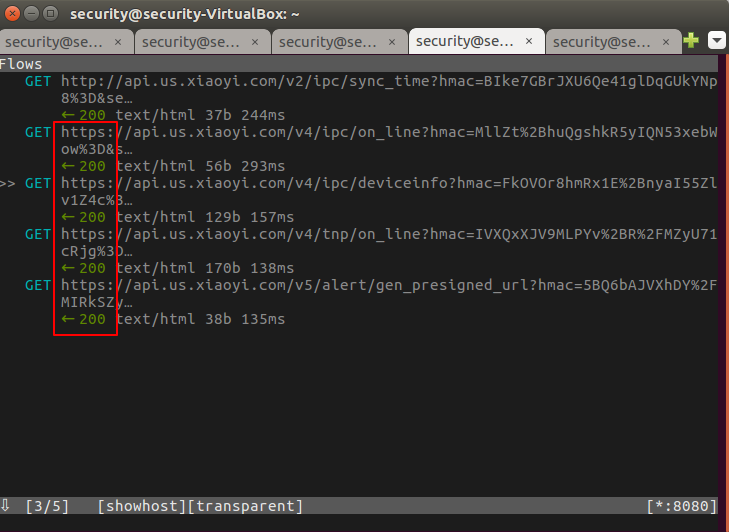
Figure 16: Viewing the HTTPS requests in the mitmproxy
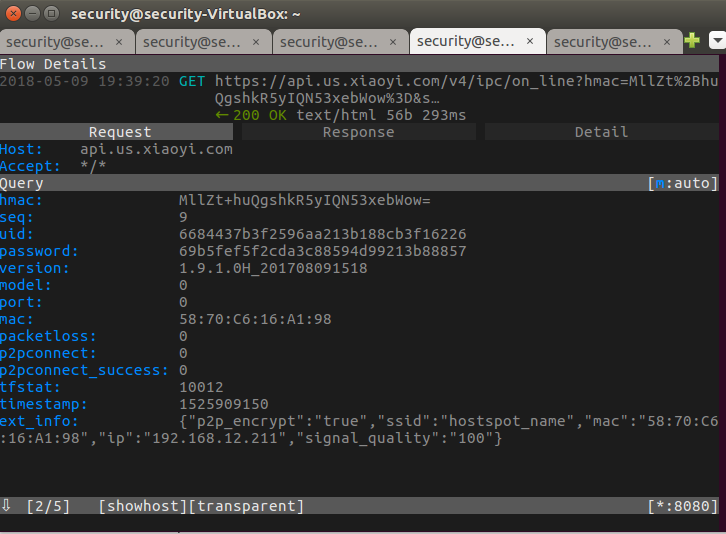
Figure 17: Viewing the details of the HTTPS request
Take Away:
- Using SSH to access a device
- Viewing SSL certificates
- Issuing certifictates for a specific domain
- MITM (Man In The Middle) attack
- Viewing HTTPS requests