Online Digital Forensics Courses and Labs
Building a Low-cost and State-of-the-art IoT Security Hands-on Laboratory
Funded by National Science Foundation (NSF)
Funded by Cyber Florida
IoT Physical Access Attack
Courtesy of Manufacturers
Instructor: Dr. Yier Jin, 352-294-0401, yier.jin@ece.ufl.edu
Prerequisite:
- Knowledge of basic usage of a command line.
- Knowledge of basic usage of Linux machine.
Goals of this tutorial:
In this tutorial the student will learn how to perform a physical attack through a device's serial port. This will be done using a Xiaofang camera.
Overview
- Acces the Xiaofang camera's serial port
- Connect through the serial port using the cracked password
Hardware Needed:
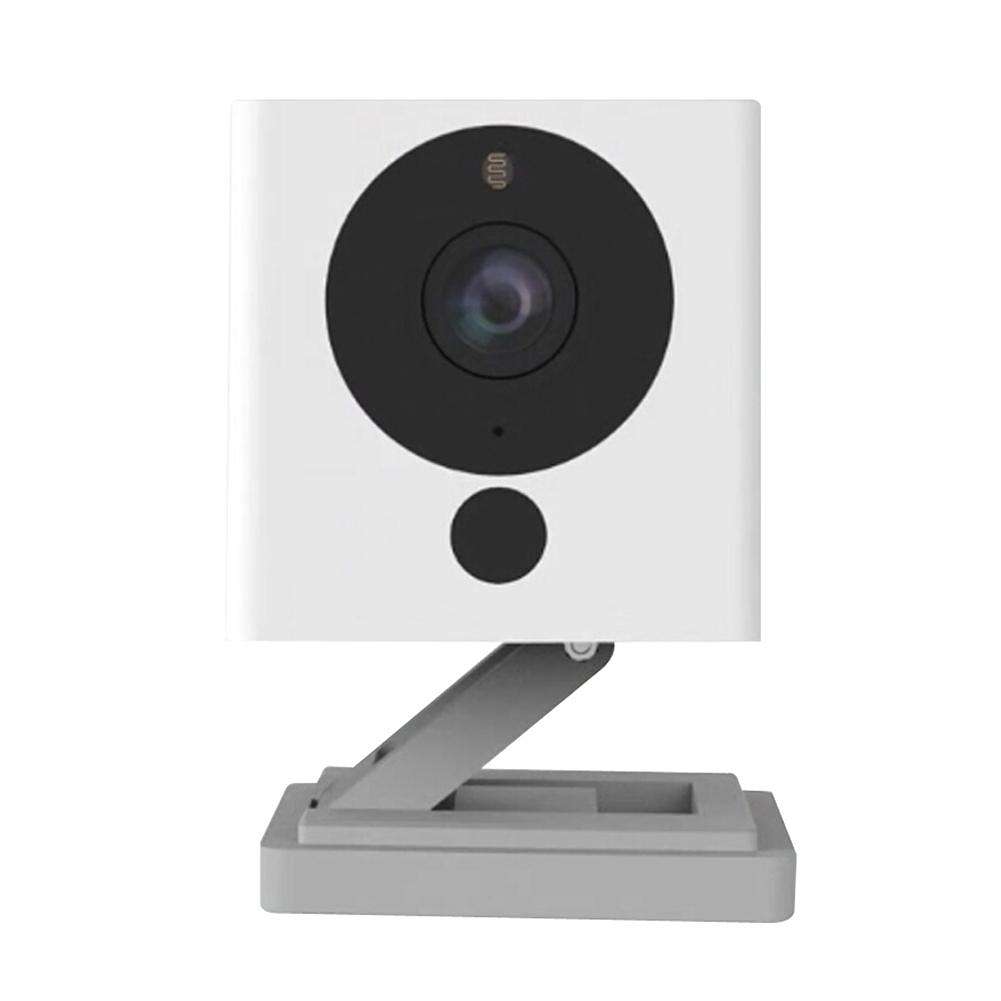
- Xiaofang smart camera, made by Xiaomi
- USB to TTL adapter
- Wire
Software Needed:
- Virtual Box (if you do not have Virtual Box installed please see Lab Setup). The system image is provided in the "environment" folder of the flash drive.
- If performing this tutorial remotely, the necessary files can be downloaded here.
- Mi Home App (Download from AppStore, Android/iOS supported, account:sslab.ece.ufl@gmail.com/Ww36306834)
Environment Setup:
Setting up the Virtual Machine:
Open Virtual Box and go to File/Import Appliance. Underneath of "Appliance to Import" select the IoT Security Ubuntu VM.ova. Boot up "IoT Security Ubuntu VM" and login with account: security/enjoy.
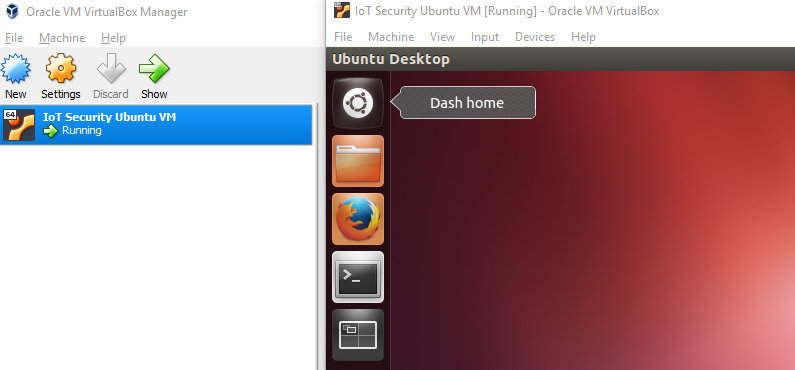
Figure 1: VirtualBox homescreen showing IoT Security Ubuntu VM
Plug in the TL-WN725N wireless adapter and connect it to the VM by going to Devices/USB and selecting "Realtek 802.11n WLAN Adapter".
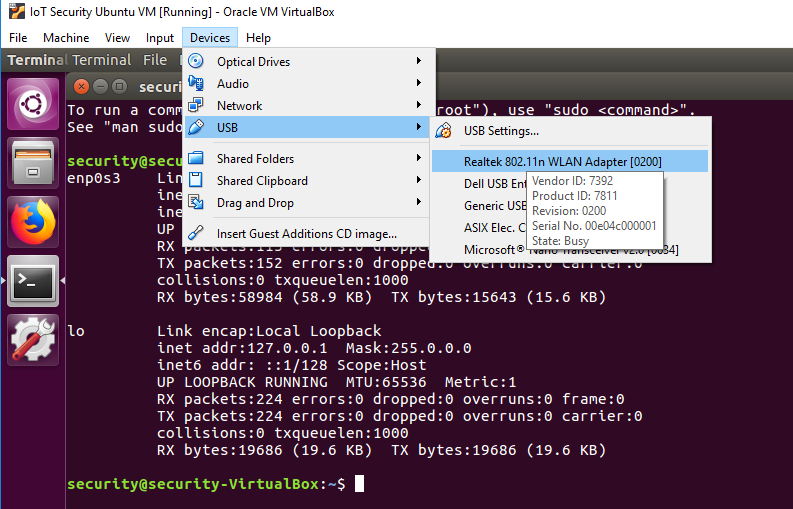
Figure 2: Selecting the network adapter
Setting Up the Wireless Shared Network within Test Operating System:
To get the wireless interface name open Terminal and enter the following command:
You might need a few minutes to wait for the current output results with the wireless interface information. The 'iwconfig' command might be blocked while acquiring results but it's ok. You should see the following outputs in Terminal:
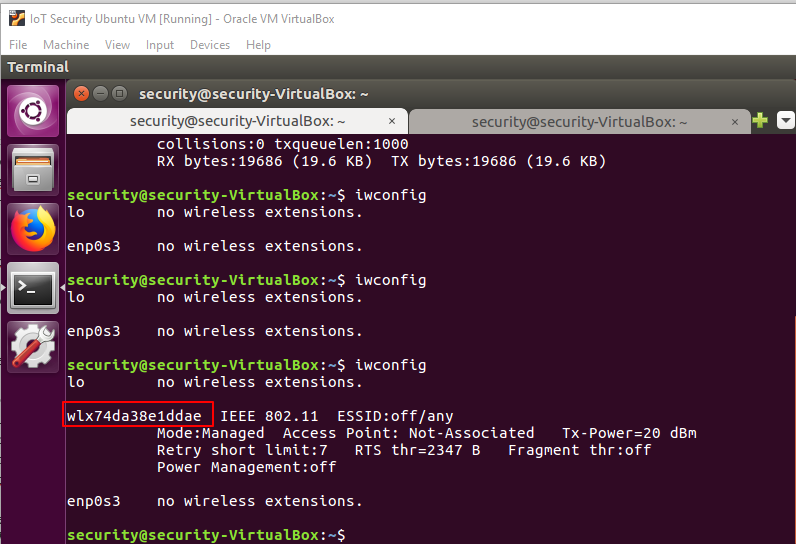
Figure 3: "iwconfig" command output
Type the following command to setup a shared wireless network for later use:
Please Note:
- Always use sudo for this operation.
- wlx74da38e1ddae is the wireless interface name that came from the last operation.
- enp0s3 is the wired/wireless interface you want to share, usually it's named enp0s3 within the Virtual Box.
- hostspot_name is the Wi-Fi name you want to create, please use a unique name to avoid mixing up Wi-Fi names with your classmates.
- changeme is the key associated with your shared hotspot, please change it for security reasons.
If create_ap gets stuck at the unmanage device step, try using the following command to fix it:
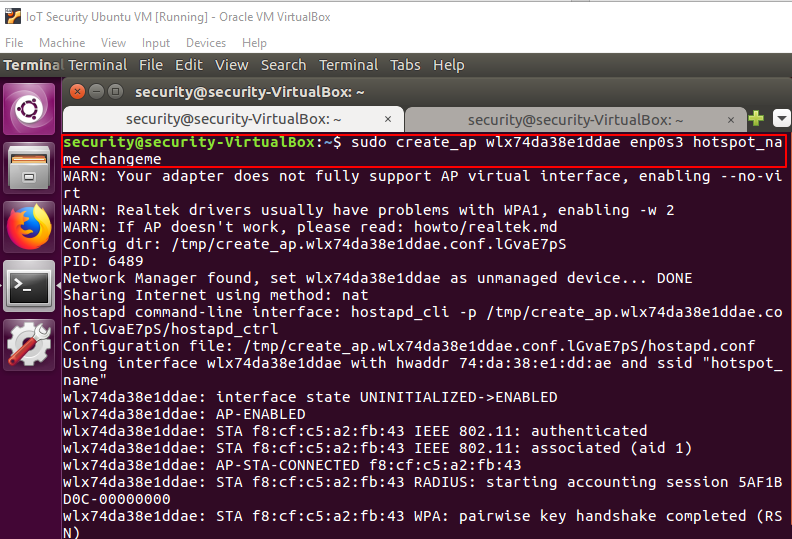
Figure 4: "create_ap" command output
Use your phone to connect to and test this shared network. Please ALWAYS keep this terminal window open to maintain the shared wireless network.
Camera Setup:
Connecting the Xiaofang Camera to the Wi-Fi without the Mi Home App:
Visit the following website: https://codepen.io/ril3y/full/gXyzmO/. Fill out the SSID and password using the same hotspot name and password you used earlier to generate the QR code.
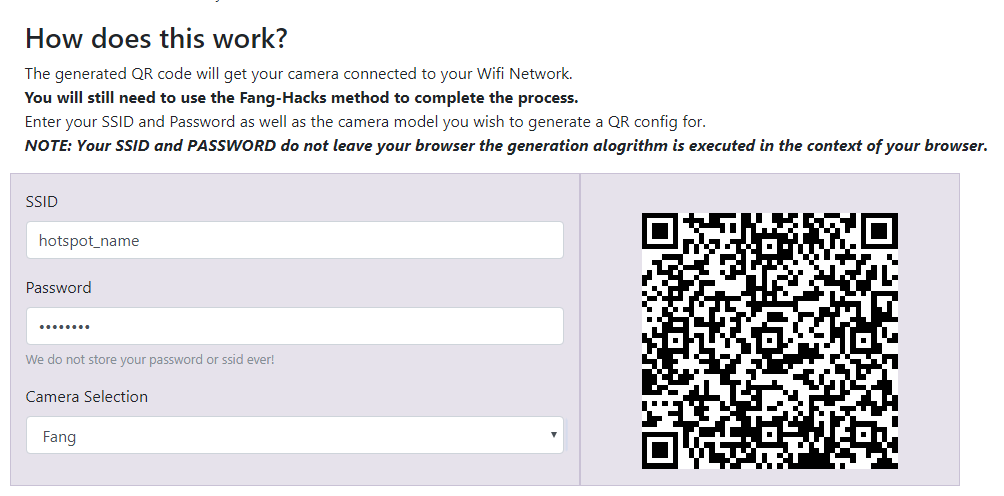
Figure 5: QR code generator
Plug the power cable into the Xiaofang camera, press the setup button on the bottom of the camera, and face the camera to the QR code. Wait until the LED keeps flashing blue instead of yellow.
If this doesn't work, please setup the Xiaofang camera with the Mi Home App. If this worked please proceed to the Remote Attack section.
Setting Up the Xiaofang Camera with the Mi Home App:
Make sure that your phone is still connected to the shared wireless network you created. Download and open the "Mi Home" app on your phone.
Log in to Mi Home with the account sslab.ece.ufl@gmail.com/Ww36306834. After logging in go to the "Profile" tab and switch the region to "Mainland China".
Press "add device" and then "add manually" to open the Xiaofang setup page. Press the "Xiaofang SMART camera" to start the Xiaofang Setup routine. Enter the password of the shared wireless network.
Unbox the Xiaofang camera and connect it to the power cable if it is not already. Press the reset button on the bottom of the Xiaofang camera and face the generated QR code to camera. After voice notice from camera, press the "Heard Scanned Successfully".
Leave the app open. Don't worry about the connection process because due to the Xiaomi regulation you can never successfully pair the Xiaofang camera outside of the Chinese mainland. The goal of this procedure is to make the Xiaofang Camera connect with our wireless network. Check the Xiaofang camera connection either with the blinking blue LED on the back of camera, or with the output debug information of the "create_ap" terminal window.
Physical Attack:
This section requires information gained from the Remote Attack lab. If you have not already completed the Remote Attack lab please complete it before moving on.
Serial Port Access:
Please refer to the Youtube Xiaofang disassemble video below for more details, by soldering the metal socket with wires, we are able to connect the serial port of Xiaofang, and the USB to TTL adapter.
To connect to the serial port @ 115200, 8, n, 1 use a serial terminal, for example, XShell on Windows, or the following command:
Open a new terminal window. To access the serial port execute
With the cracked password, you can login to the Xiaofang via serial port.
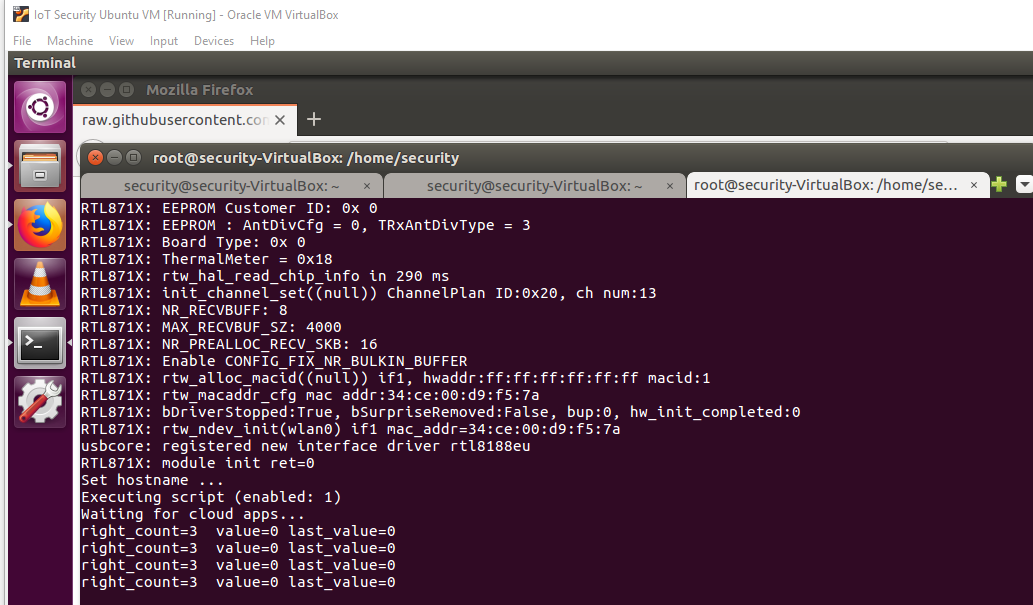
Figure 14: Logged in via serial access
To use the Linux serial port device, you can also check the correct serial port device name with
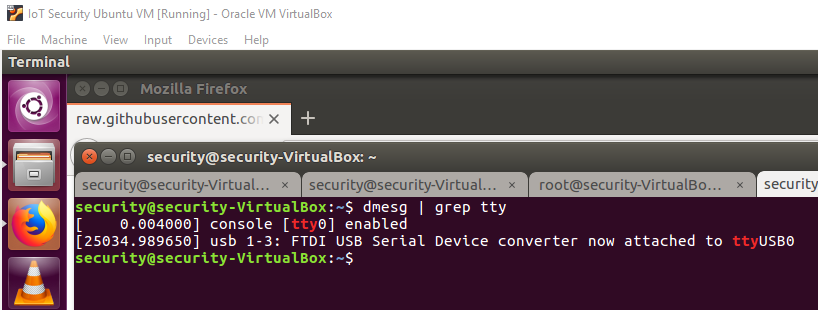
Figure 15: Checking serial port device name
However, the serial port outputs contains a lot of irrelevant information and you can just ignore them.
Take Away:
- Accessing a Xiaofang Camera through serial port