Online Digital Forensics Courses and Labs
Building a Low-cost and State-of-the-art IoT Security Hands-on Laboratory
Funded by National Science Foundation (NSF)
Funded by Cyber Florida
IoT Remote Access Attack
Courtesy of Manufacturers
Instructor: Dr. Yier Jin, 352-294-0401, yier.jin@ece.ufl.edu
Prerequisite:
- Knowledge of basic usage of a command line.
- Knowledge of basic usage of Linux machine.
Goals of this tutorial:
In this tutorial, the learner will learn how to use SSH to access a device and modify its firmware. They will crack a device's password using Telnetd Brute Force and hack a password-protected RTSP stream. After cracking the device's password, the learner can perform a physical attack through a serial port. These will be done using a Xiaofang camera.
Overview:
- SSH into the Xiaofang camera and modify its firmware
- Crack the camera's password using Telnetd Brute Force
- Hack into the camera's password-protected RTSP stream
Hardware Needed:
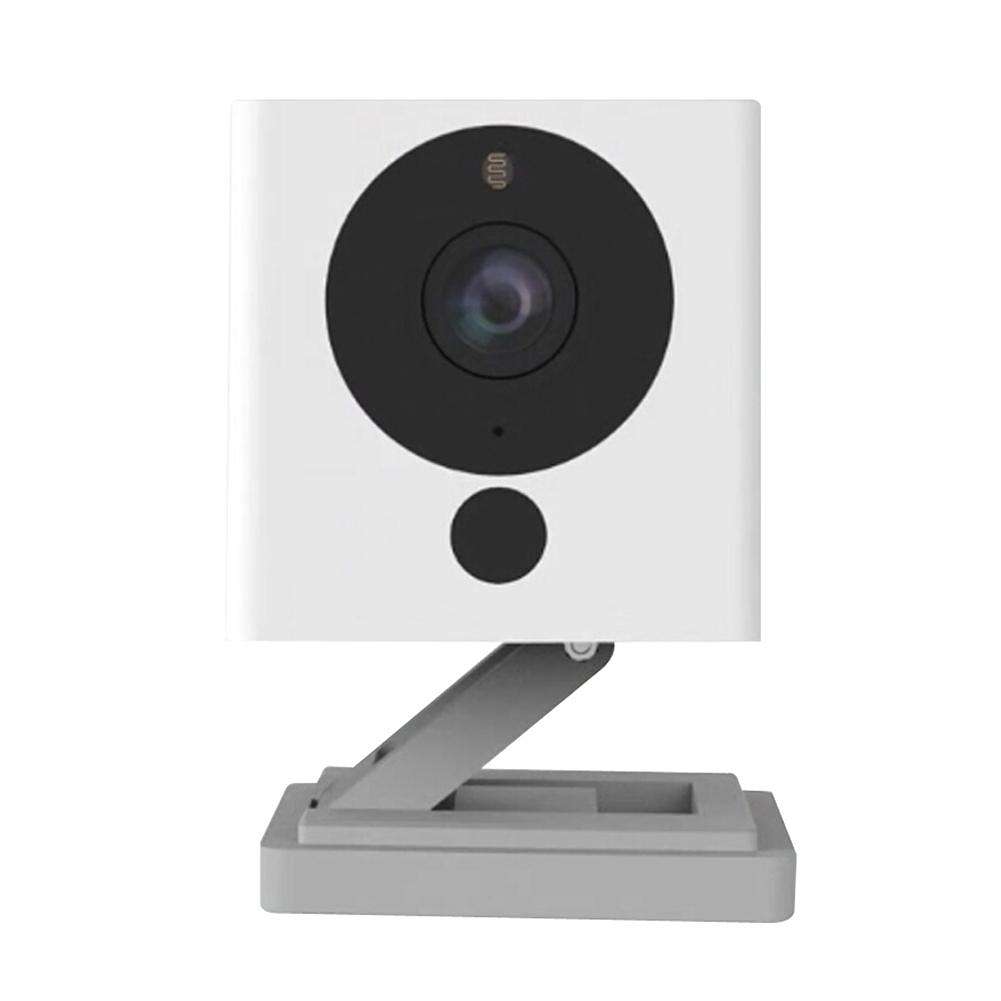
- Xiaofang smart camera, made by Xiaomi
- TL-WN725N wireless adapter
- SD Card
Software Needed:
- Virtual Box (if you do not have Virtual Box installed please see Lab Setup). The system image is provided in the "environment" folder of the flash drive.
- Some students may run into an issue and get an error when trying to start the Virtual Machine. If you get this error please ensure to enable virtualization on your computer's BIOS settings. An example can be seen here: https://amiduos.com/support/knowledge-base/article/enabling-virtualization-in-lenovo-systems
- Win32DiskImager (Disk image burner for windows, see 'environment' of flash drive)
- VLC Player (provided in test operating system)
- Hydra (provided in test operating system)
- Mi Home App (Download from AppStore, Android/iOS supported, account:sslab.ece.ufl@gmail.com/Ww36306834). You can use the provided account or create your own account.
Environment Setup:
Setting up the Virtual Machine:
Open Virtual Box and go to File/Import Appliance. Underneath of "Appliance to Import" select the IoT Security Ubuntu VM.ova. Boot up "IoT Security Ubuntu VM" and login with account: security/enjoy.
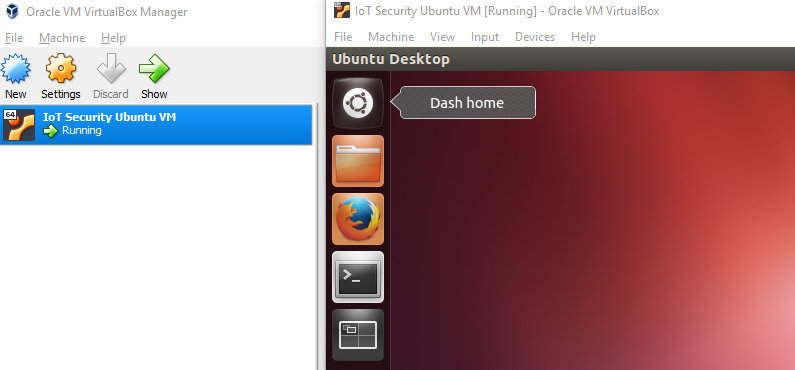
Figure 1: VirtualBox homescreen showing IoT Security Ubuntu VM
Plug in the TL-WN725N wireless adapter and connect it to the VM by going to Devices/USB and selecting "Realtek 802.11n WLAN Adapter".
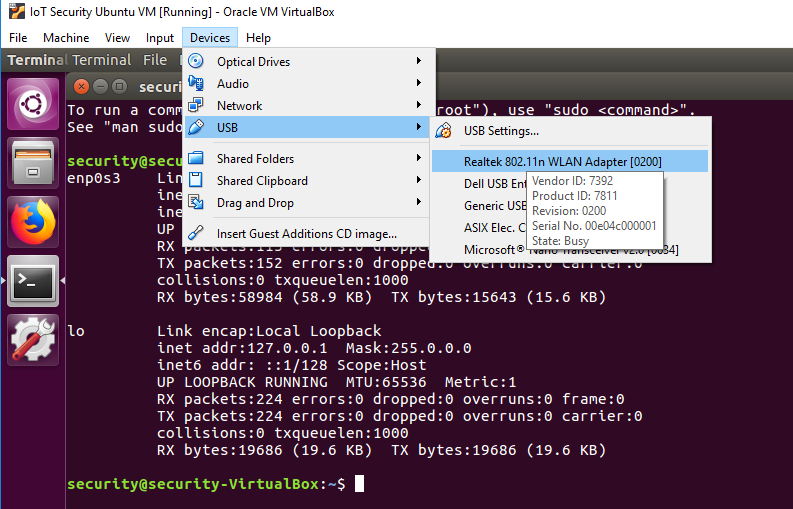
Figure 2: Selecting the network adapter
Setting Up the Wireless Shared Network within Test Operating System:
To get the wireless interface name open Terminal and enter the following command:
You might need a few minutes to wait for the current output results with the wireless interface information. The 'iwconfig' command might be blocked while acquiring results but it's ok. You should see the following outputs in Terminal:
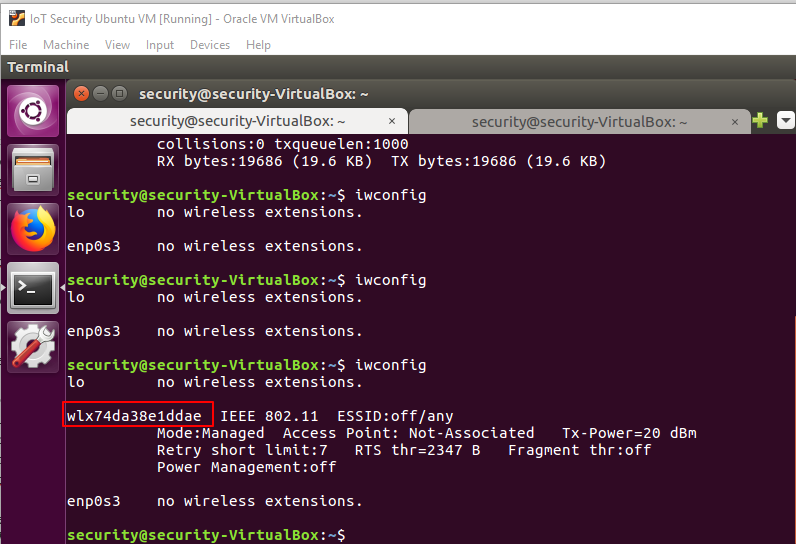
Figure 3: "iwconfig" command output
Type the following command to setup a shared wireless network for later use:
Please Note:
- Always use sudo for this operation.
- wlx74da38e1ddae is the wireless interface name that came from the last operation.
- enp0s3 is the wired/wireless interface you want to share, usually it's named enp0s3 within the Virtual Box.
- hostspot_name is the Wi-Fi name you want to create, please use a unique name to avoid mixing up Wi-Fi names with your classmates.
- changeme is the key associated with your shared hotspot, please change it for security reasons.
If create_ap gets stuck at the unmanage device step, try using the following command to fix it:
Figure 4: "create_ap" command output
Use your phone to connect to and test this shared network. Please ALWAYS keep this terminal window open to maintain the shared wireless network.
Camera Setup:
Connecting the Xiaofang Camera to the Wi-Fi without the Mi Home App:
Visit the following website: https://codepen.io/ril3y/full/gXyzmO/. Fill out the SSID and password using the same hotspot name and password you used earlier to generate the QR code.
Figure 5: QR code generator
Plug the power cable into the Xiaofang camera, press the setup button on the bottom of the camera, and face the camera to the QR code. Wait until the LED keeps flashing blue instead of yellow.
If this doesn't work, please setup the Xiaofang camera with the Mi Home App. If this worked please proceed to the Remote Attack section.
Setting Up the Xiaofang Camera with the Mi Home App:
Make sure that your phone is still connected to the shared wireless network you created. Download and open the "Mi Home" app on your phone.
Log in to Mi Home with the account sslab.ece.ufl@gmail.com/Ww36306834. After logging in go to the "Profile" tab and switch the region to "Mainland China".
Press "add device" and then "add manually" to open the Xiaofang setup page. Press the "Xiaofang SMART camera" to start the Xiaofang Setup routine. Enter the password of the shared wireless network.
Unbox the Xiaofang camera and connect it to the power cable if it is not already. Press the reset button on the bottom of the Xiaofang camera and face the generated QR code to camera. After voice notice from camera, press the "Heard Scanned Successfully".
Leave the app open. Don't worry about the connection process because due to the Xiaomi regulation you can never successfully pair the Xiaofang camera outside of the Chinese mainland. The goal of this procedure is to make the Xiaofang Camera connect with our wireless network. Check the Xiaofang camera connection either with the blinking blue LED on the back of camera, or with the output debug information of the "create_ap" terminal window.
Remote Attack:
Downloading the Modified Firmware Image:
The modified firmware image is already downloaded and placed into the "environment/Xiaofang" folder. The image name is "fanghacks_v0.2.0.img".
Preparing an SD Card with the firmware (Flashing the SD Card):
An SD card has already been flashed with the necessary firmware. In case you need to reflash the SD card read the following paragraph:
Insert the 4GB micro SD card into your computer. Launch Win32DiskImager and choose the right image file and device, fanghacks_v0.2.0.img and micro SD card respectively. Click "Write".
Placing the SD card into the camera:
Boot the device without the SD card. Wait until the blue LED keeps flashing and then insert the SD card. If the SD card is mounted correctly you should hear a "Ding Ding" sound. If not, Please do not proceed to the next step and reflash the micro SD card.
Note: To prevent the SD Card form being mounted incorrectly please do not boot the device with the SD card inserted and then re-insert it.
Finding the Xiaofang camera IP address:
Open a new terminal window and use the following command to check the Xiaofang camera IP address:
Usually the last "dnsmasq -dhcp REQUEST" message contains the IP address of the recently connected Xiaofang camera. Since you have connected your phone earlier it may show up. As seen in the image below 192.168.12.200 wasn't selected as the Xiaofang's IP address because the last log indicates it belongs to an android phone.
Figure 6: Finding the Xiaofang's IP Address
Verifying the IP address just found:
To verify the IP address check the camera 80 port status using the following command inserting the IP address you found for "IP_ADDRESS":
You should see a similar output to the following image:
Figure 7: Verifying the Xiaofang's IP Address
Open Firefox and visit "http://device-ip/cgi-bin/hello.cgi" where "device-ip" is your camera's IP address. You should see the following page:
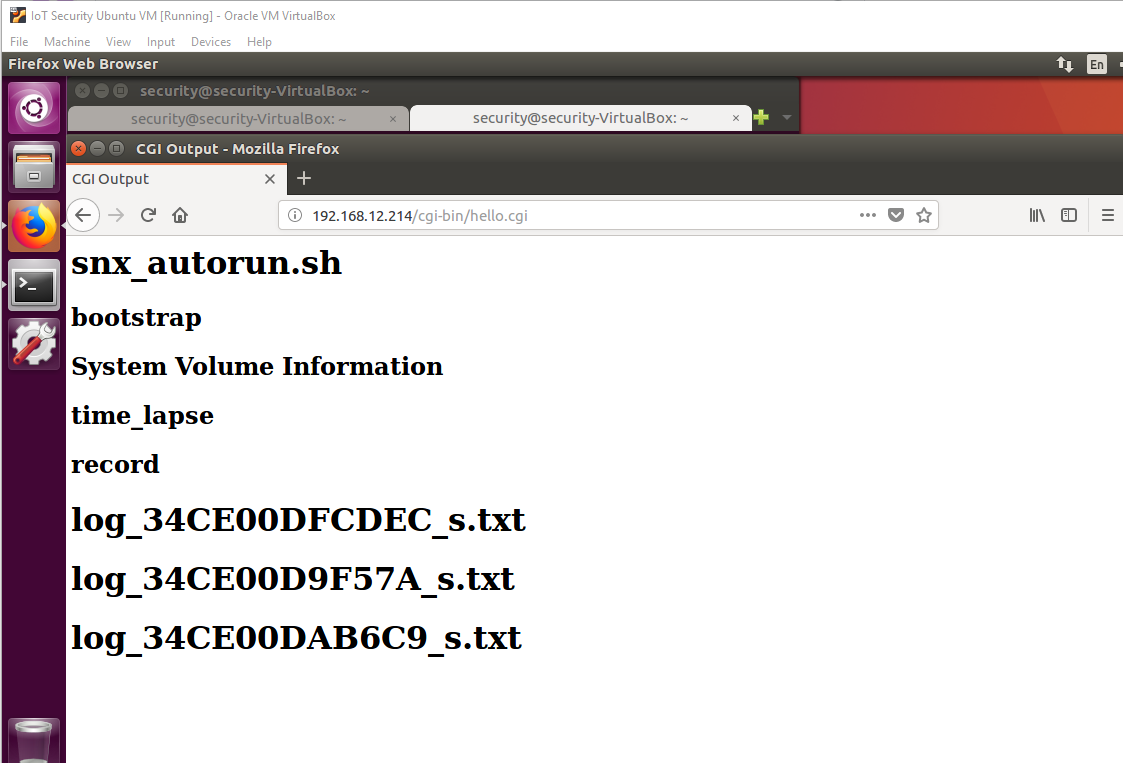
Figure 8: Page opened in Firefox
Enabling the hacks:
To enable the hacks visit "http://device-ip/cgi-bin/status" and click "Apply". You should see the screen below:
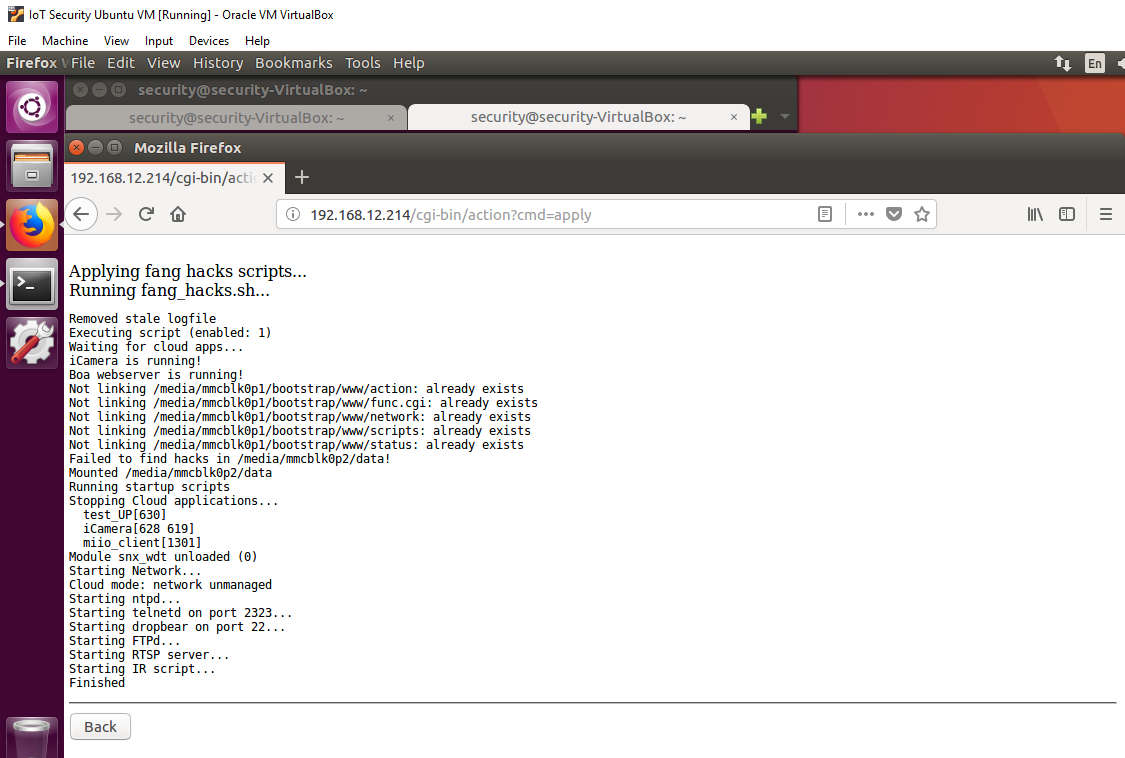
Figure 9: Enabling the hacks
Verify the hack and SSH into the camera with the following command:
The password is "ismart12". You should see "Welcome to XiaoFang Hacks : - )" like the screen below:

Figure 10: Xiaofang Hacks
Replacing the original RTSP with a modified one (Protected by password):
Execute command within Virtual Box terminal:
Execute command within Virtual Box terminal:
If you get the "text file busy" error go back to the webpage where the hacks were applied. Click the "back" button, go to "manage scripts" and stop the "20-rtsp-server" process.
Login Xiaofang camera with SSH and execute command:
Configuration to Enable SSH and RTSP Service:
Connect the Xiaofang camera with Wi-Fi, and visit "http://device-ip/cgi-bin/scripts", where device-ip is the IP address for your camera. Start "00-stop-cloud", "11-dropbear", and "20-rtsp-server". Check that those three statuses are green except for "00-stop-cloud", if not please call for assistance.
SSH/Telnetd brute force:
Provide SSH/Telnetd brute force script hydra and an IoT device weak password list which contains the default SSH password of Xiaofang. Go to "~/Work/ssh" by executing
Once there, execute the following command:

Figure 11: Running Hydra
Once succeeded, we can have remote access to modify and check the online system of the Xiaofang camera. Use the following command to SSH into the device and verify the cracked password:
RTSP Hacking:
The Real Time Streaming Protocol (RTSP) is a network control protocol designed for use in entertainment and communications systems to control streaming media servers. The RTSP service within Xiaofang system can give us the ability to watch the real-time video stream shot by the camera. However, the RTSP service is protected by password. With the SSH/Telnetd access, attendees can find out the RTSP password by either checking the process parameters or the configuration file of Xiaofang system.
Launch VLC Player and navigate to Media/Open Network Stream. Open the following stream "rtsp://my_ip:554/media/stream1", then check the real-time camera video stream.
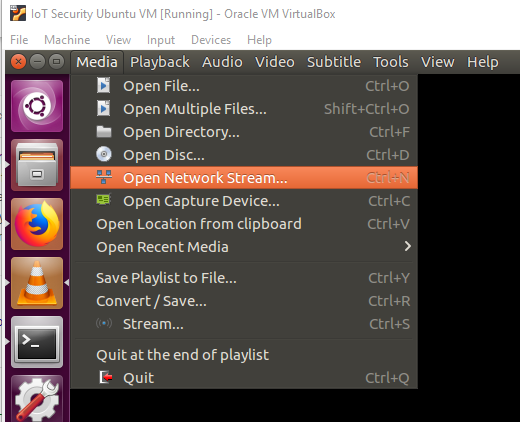
Figure 12: VLC Menu
You can see the RTSP is protected by password.
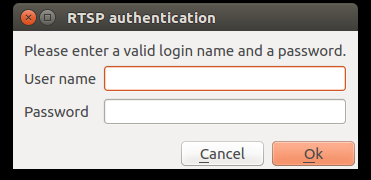
Figure 12: Stream protected by password
Login to the Xiaofang camera SSH service with the cracked password and execute the following command to locate the suspicious process:
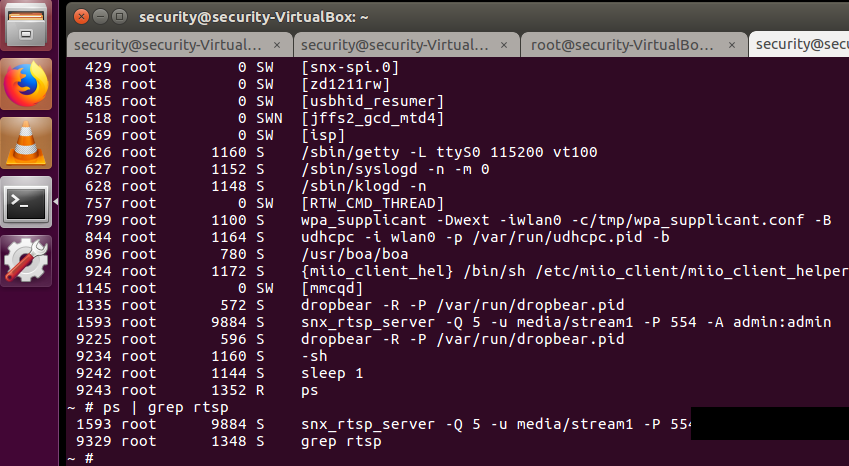
Figure 13: Username and Password found
In this case, clearly the password and account are admin and admin. You can also check the configuration file "/media/mmcblk0p2/data/etc/scripts/20-rtsp-server" to find out corresponding password.
Use admin:admin to view the real time stream feed captured by your Xiaofang camera.
Take Away:
- Smart camera architecture
- Using SSH to access a device
- Modifying the firmware of a Xiaofang Camera
- Password cracking with Telnetd Brute Force
- Hacking a password-protected RTSP stream